Matt
Owner
As requested by @RoldanLT
So, my server was given a /64 range of IPV6 addresses. I only need a couple of these.
This actually gives me
That's a LOT of addresses!
Now, to assign these to your NIC card in CentOS, you need to add these to ethernet interface
This is the default config that my server came with, and only 1 had IPV6 address configured
You need to add the additional addresses as IPV6ADDR_SECONDARIES
I'm going to use the first 4 in the range
Restart your NIC card /etc/init.d/network restart
You will now see those addresses configured
You now need to make sure you application can use those addresses.
For nginx built with Centminmod, you need to edit the centmin.sh file and set IPV6 to YES
Now re-build nginx.
Once that is done, you can assign an IPv6 address to the site(s)
For the config files in /usr/local/nginx/conf/conf.d/ in your server block:
Restart nginx
You will now see the listen being posted on that IP address using netstat
Then, you need to add a DNS entry for it

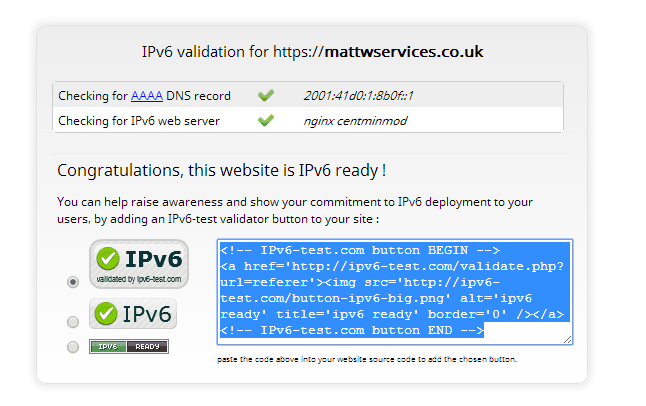
You should then be ready to test the site
http://ipv6-test.com/validate.php

So, my server was given a /64 range of IPV6 addresses. I only need a couple of these.
Code:
2001:41D0:1:8B0f::/64
Code:
Start Range: 2001:41d0:1:8b0f:0:0:0:0
End Range: 2001:41d0:1:8b0f:ffff:ffff:ffff:ffff
No. of host: 18446744073709551616Now, to assign these to your NIC card in CentOS, you need to add these to ethernet interface
Code:
/etc/sysconfig/network-scripts/ifcfg-eth0This is the default config that my server came with, and only 1 had IPV6 address configured
Code:
DEVICE=eth0
BOOTPROTO=static
IPADDR=91.121.86.15
NETMASK=255.255.255.0
ONBOOT=yes
GATEWAY=91.121.86.254
IPV6INIT=yes
IPV6_AUTOCONF=no
IPV6ADDR=2001:41D0:1:8B0f::1/64
You need to add the additional addresses as IPV6ADDR_SECONDARIES
I'm going to use the first 4 in the range
Code:
DEVICE=eth0
BOOTPROTO=static
IPADDR=91.121.86.15
NETMASK=255.255.255.0
ONBOOT=yes
GATEWAY=91.121.86.254
IPV6INIT=yes
IPV6_AUTOCONF=no
IPV6ADDR=2001:41D0:1:8B0f::1/64
IPV6ADDR_SECONDARIES="2001:41d0:1:8b0f::2/64 \
2001:41d0:1:8b0f::3/64 \
2001:41d0:1:8b0f::4/64"
Restart your NIC card /etc/init.d/network restart
You will now see those addresses configured
Code:
[root@host ~]# ifconfig
eth0      Link encap:Ethernet  HWaddr 4C:72:B9:4E:DE:B8
          inet addr:91.121.86.15  Bcast:91.121.86.255  Mask:255.255.255.0
          inet6 addr: 2001:41d0:1:8b0f::4/64 Scope:Global
          inet6 addr: 2001:41d0:1:8b0f::3/64 Scope:Global
          inet6 addr: 2001:41d0:1:8b0f::2/64 Scope:Global
          inet6 addr: 2001:41d0:1:8b0f::1/64 Scope:Global
          inet6 addr: fe80::4e72:b9ff:fe4e:deb8/64 Scope:Link
          UP BROADCAST RUNNING MULTICAST  MTU:1500  Metric:1
          RX packets:34594219 errors:0 dropped:0 overruns:0 frame:0
          TX packets:50375374 errors:0 dropped:0 overruns:0 carrier:0
          collisions:0 txqueuelen:1000
          RX bytes:30177374559 (28.1 GiB)  TX bytes:61721279662 (57.4 GiB)
          Interrupt:20 Memory:fe500000-fe520000

lo        Link encap:Local Loopback
          inet addr:127.0.0.1  Mask:255.0.0.0
          inet6 addr: ::1/128 Scope:Host
          UP LOOPBACK RUNNING  MTU:65536  Metric:1
          RX packets:26110940 errors:0 dropped:0 overruns:0 frame:0
          TX packets:26110940 errors:0 dropped:0 overruns:0 carrier:0
          collisions:0 txqueuelen:0
          RX bytes:43405433324 (40.4 GiB)  TX bytes:43405433324 (40.4 GiB)
You now need to make sure you application can use those addresses.
For nginx built with Centminmod, you need to edit the centmin.sh file and set IPV6 to YES
Code:
NGINX_IPV='y' #NGINX IPV6 compile support for unattended mode onlyNow re-build nginx.
Once that is done, you can assign an IPv6 address to the site(s)
For the config files in /usr/local/nginx/conf/conf.d/ in your server block:
Code:
server {
        listen       443 ssl spdy;
        listen [2001:41d0:1:8b0f::1]:443 ssl spdy;
        server_name  mattwservices.co.uk;
        keepalive_timeout  30;
Restart nginx
You will now see the listen being posted on that IP address using netstat
Code:
[root@host conf.d]# netstat -an | grep ::1
tcp        0      0 2001:41d0:1:8b0f::1:443     :::*                        LISTEN
Then, you need to add a DNS entry for it

You should then be ready to test the site
http://ipv6-test.com/validate.php


